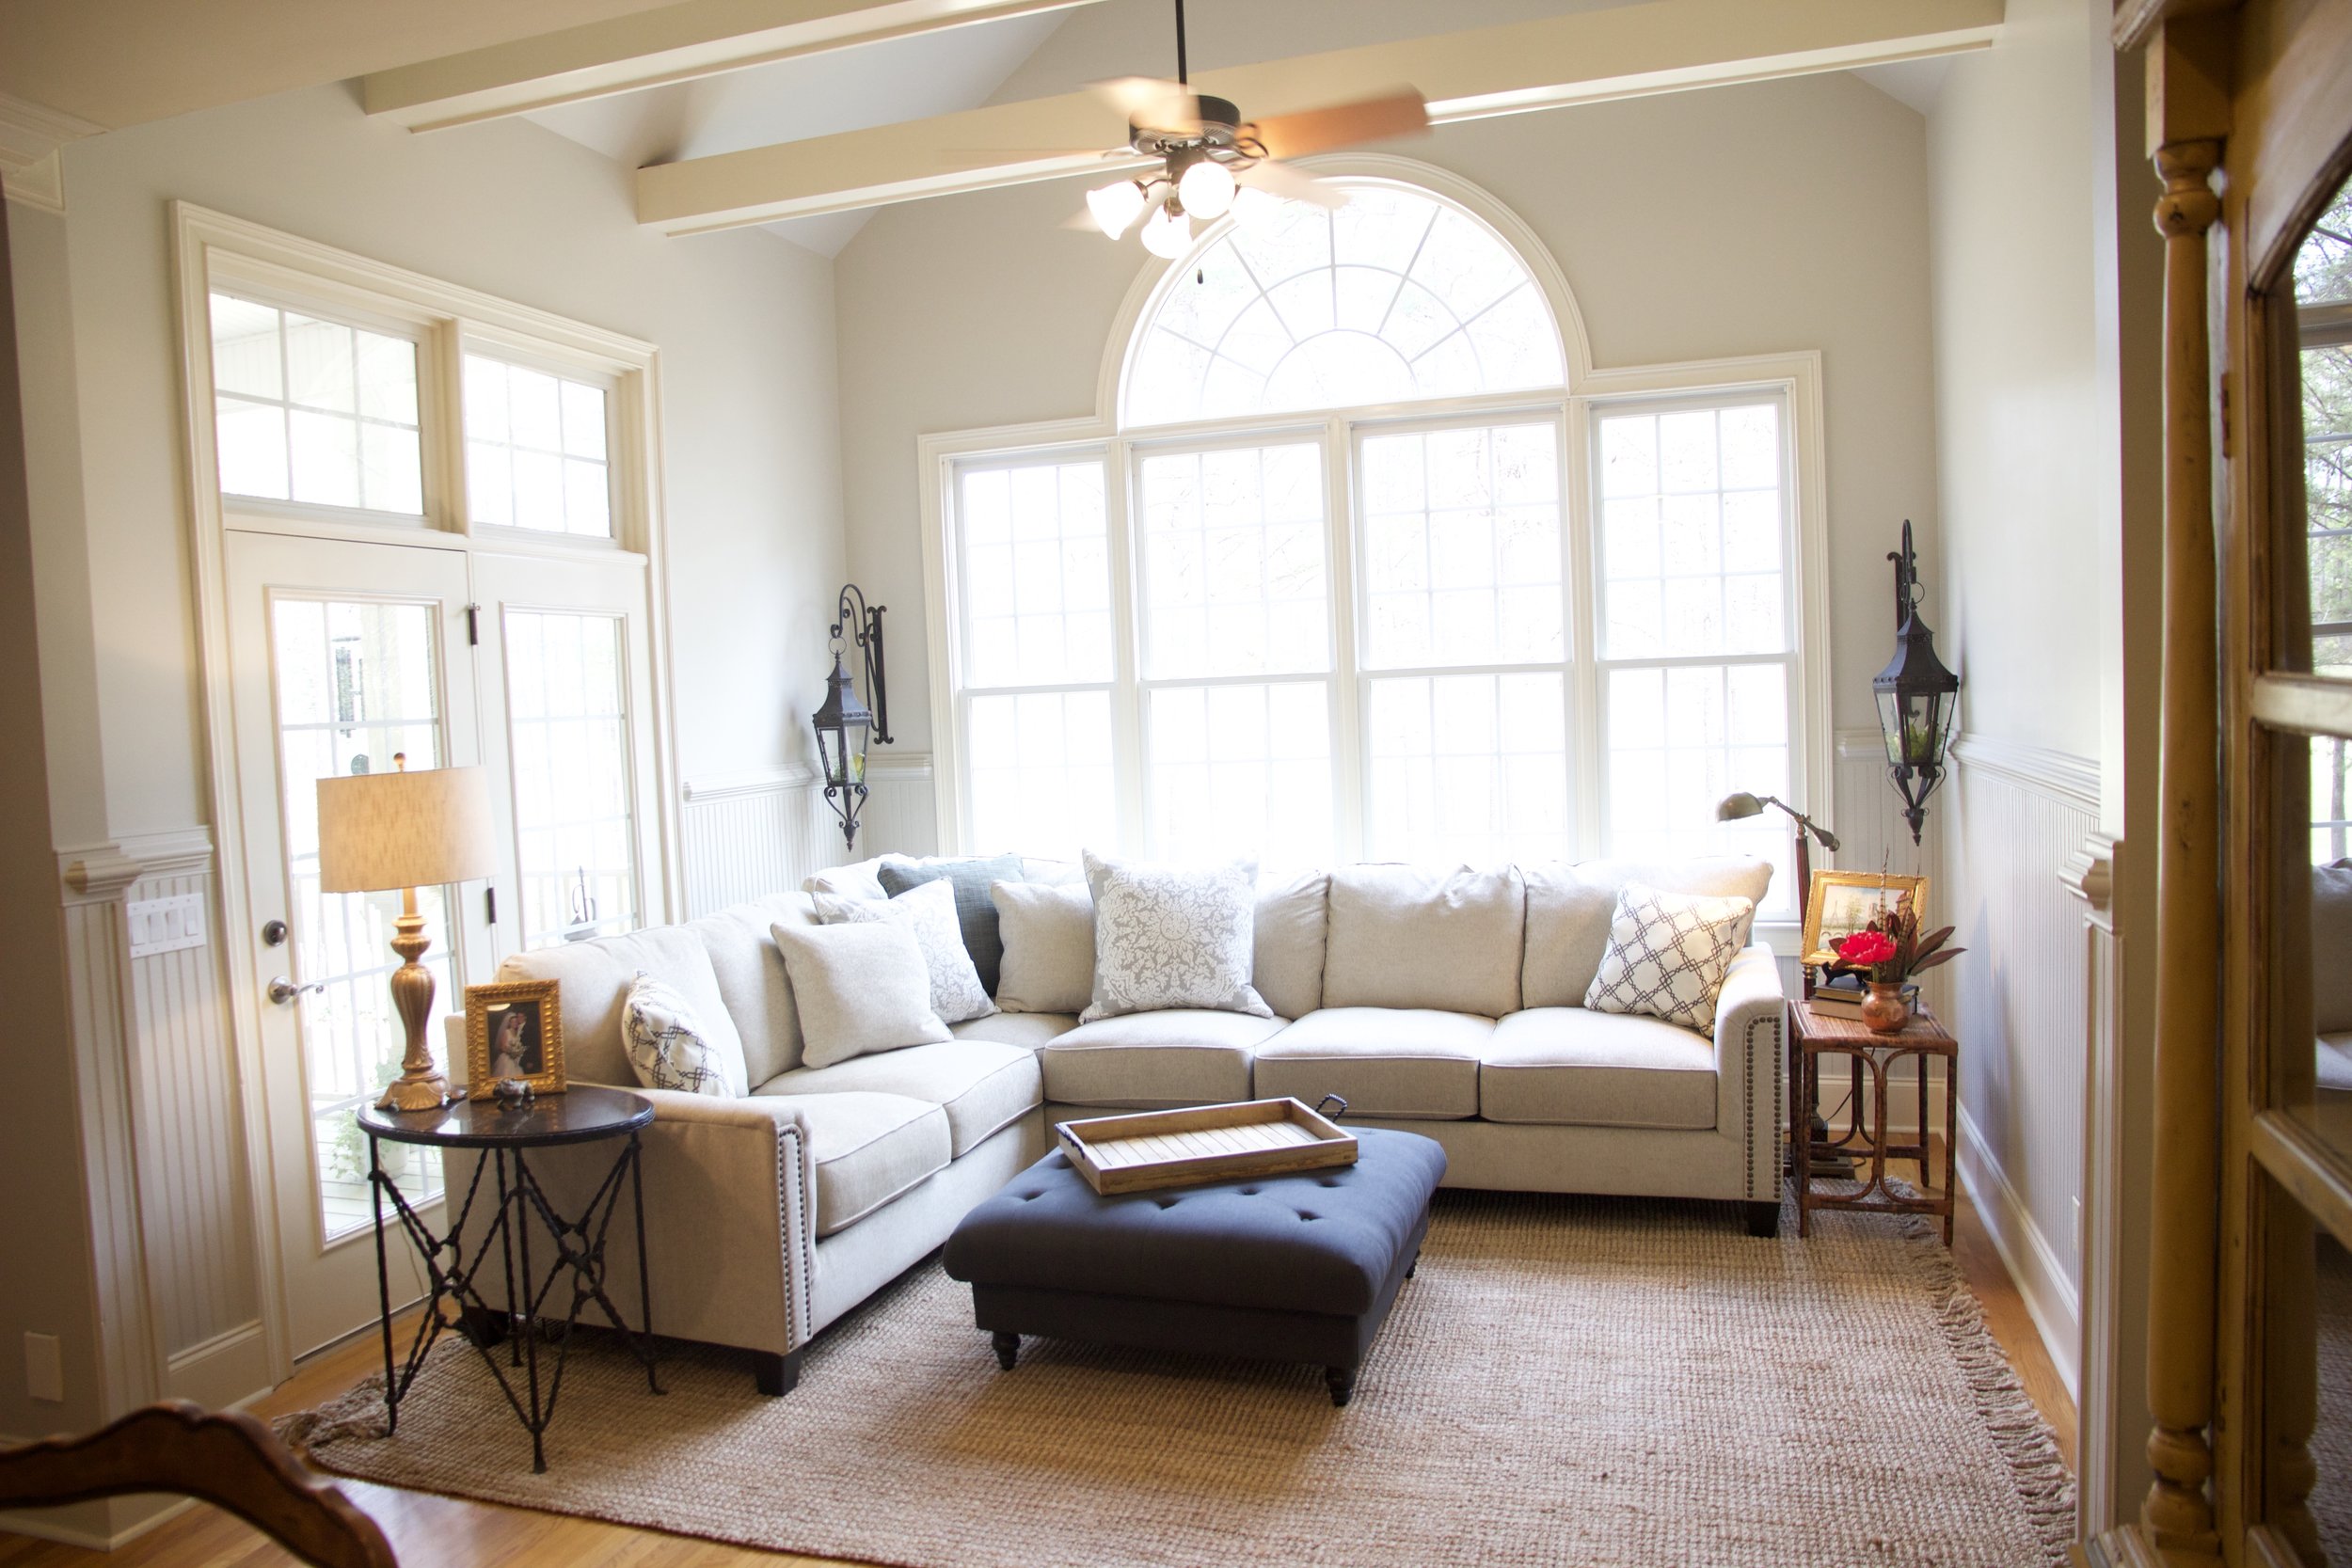
Gigi's House

Ahhhh Gigi's.  Who can live without the great-grandmas in this world?  Not I!  My great-grandmother was my hero.  She was like no other.  Her spirited laugh and feisty personality made her the most lovable woman you'll ever meet.  She could cook like no other and she was always thrilled to sit and play some competitive card games.

Well my daughters have a very spirited great-grandmother as well.  Her name is Gigi.  Like my own great-grandmother, Gigi is a fabulous cook.  She is a spirited card-player.  And she has serious spunk.  Did I mention, she is FULL BLOWN ITALIAN.  Yep.  Drew's grandma is a pint-sized Italian woman with a knack for the garden and a New Yorker accent.  She can grow a basil plant to roughly the size of a tree, and then make you the meanest 'macaroni pesto' you've ever had.

So when she asked me to decorate her living room in upstate New York, I didn't refuse.  She had a few stipulations.  Bright and airy.  Lots of pictures of grand-kids and great-grands.  Keep it cozy.  Piece of cake.  We whipped up this design job in less then a month!  Here is the big reveal!


BEFORE:

BEFORE

BEFORE

BEFORE


And now for the AFTER TOUR!!!!!


AFTER:  Gigi got two new recliners.  They're a great scale for this cozy living room.  New photo frames showcase kids and grandkids in the hallway.  We relocated the black bookcases because they were taking up a lot of the living room.  The two new area rugs match, making the space feel cohesive.

AFTER:  The huge picture window looks twice the size and extra bright.  I doubled the size of her rod and brought in four plain white panels instead of two floral ones.  We did the 'old curtain trick', and hung the rods as high as possible.  The TV was placed on this gorgeous chest that Gigi already owned.  Matching end tables and matching mercury glass lamps flank the original sofa to give it new life.  Bible verse inspiration art was hung and the extra dining chair was placed in the living room.  Easily accessible for a card game on girl's night.

AFTER:  I turned the end base cabinet on it's side to allow the living room to feel larger (it was a moveable cabinet).  We hung Gigi's existing clock in the dining room for some drama.  The table was turned the opposite way and two new area rugs were brought in for added cheer.

AFTER:  Gigi also requested a dining room shelf.  We were able to give her one and display some of her gorgeous white dish wares.  A boxwood wreath adds a pop of green.  I used new florals in one of Gigi's vessels for a fresh table scape.  I bought Gigi a new tray and we were able to use her existing light.

AFTER:  The new tufted ottoman is a much smaller scaled piece which suites the room.  Gigi's existing vase and tray, house new fun florals.  How gorgeous is this distressed rug?

AFTER:  A menagerie of brand new pillows freshen up the space and add a pop of color to the sofa.

AFTER:  Artichokes are Gigi's favorite.

AFTER

Another exciting re-design!  That's a wrap y'all!  

XOXO from New York!

My Dining Room BEFORE & AFTER

I'm squeezing in a little BEFORE & AFTER for y'all!  It's my own personal dining room!  I have been so busy helping some other clients, that personal projects have went on the back burner.  However, usually what happens when I work on a client's house, I get inspired for my own house.  Funny how that works out!

Here is our BEFORE photo of our dining room.  Our dining room probably wasn't originally supposed to be a dining room.  It was probably a sun room or family room.  But we opted to use it as a massive dining room because our living room is plenty large.  I encourage you as a reader to try and make every room in your home useful.

There are many qualms with this room.  I really didn't like the color of the brick fireplace.  So we decided that would be painted.  I also asked darling husband to build a mantle because there was no mantle.

  The room is also extremely large.  This made it feel really cold.  I wanted something on the walls to warm the space up.  The buffet I planned to use,  had been our daughter's dresser and really needed an upgraded paint job.

We will still have plenty to do.  I would eventually like to save up for a chandelier.  And eventually we will make a table and benches.  

I included some fun photos of my Easter/Spring tablescape as well!  Those antique Homer and Laughlin dishes were $35 for the box at a yard sale in high school!  

For now our Goodwill chairs and yard sale table will do!  Enjoy the AFTER photos!

AFTER:

We did Queen Ann Wainscotting.  It's almost 6 foot high.  But I love it.  We also added a chalkboard because the wall was so so vast.

AFTER:  I hung curtains and decorated my new mantle!  Darling husband used barnwood that we found in our basement!

AFTER:  Who doesn't love a dining room fireplace?  I found this English print at a thrift store.  I love finding cutting boards at thrift stores as well.

AFTER: My $1 mirror got a coat of gold paint.  

AFTER: The table scape is all thrifted items!  

AFTER:

AFTER:

AFTER:

AFTER:

AFTER: These German paper-mache eggs were my Great Grandmother Mary's favorite.  They are a favorite German tradition and we love them!

AFTER:

AFTER:

AFTER:

AFTER:

Thanks for tuning in!  I pray you have a blessed Easter and a wonderful time celebrating with family and friends!

Love Y'all!

Ashley

CiCi's Place

SO.  If y'all remember right, I have a dear Cici (She's a bonus mom) and she lives in Georgia.  She and RB have taken care of Drew and I since we were 22 years old.  They sold us our first ever home.  Then they took a pack of teenagers to that same house, circled it, and prayed over it, before we ever moved from Baltimore to Atlanta.  

They have dropped food on our doorstep, taken us for our first-ever view of the Gulf of Mexico.  They've been in the hospital every time Drew had a life-threatening catastrophe.  They've prayed and cried with us through the angst of not getting pregnant.  They've sat in the hospital while I was in labor.  They've moved us a million times.  We've all shared about 394 bowls of grits at Flying Biscuit.  And 4,493 chips at Chili's.  They have poured concrete and helped us design porches and decks and every other big renovation-dream you can think of.  They've never stopped encouraging Drew in his calling and they've never ceased in pulling my dreams out of me.  

RB's famous words: "Ash, what's your dream?".  And Drew always got the same question.  Every time we were all out to eat (weekly).  Every time we were sitting around a bonfire.  Every time we were up way too late in their living room: "What's your dream?".  

I'll stop and take a minute to say, that if you don't have friends that ask you this question weekly, then try and find that next level with your friends.  Or find new friends.  RB and Cici are the type of friends that don't believe in stagnation.  Not with personal spiritual walks, not with Drew's calling to be a pastor, and certainly not with passions and God-given creative talents.  

Let me stop and say...that this is a like being in a pack of dreamers.  Mostly RB and Drew (Holly you're in there too).  Cici and I tend to be the "let's just get it done" girls (you too Kass).  But dreaming is biblical.  And wasting time isn't.  RB and Cici are the type of people who want to see everyone succeed.  There is no one quite like these two.

Anyway.  It's an honor to decorate whenever they need someone to "play around the house".  So during our leisure trip to Georgia, I got to play in their upstairs for a bit.  And it's my love language so I'm usually hard-pressed not to do it.  Prior to flying down, Cici, Kassie and I had FaceTime'd paint colors.


LIVING ROOM BEFORE:

KEEPING ROOM BEFORE:


AND here are the After photos!!!


LIVING ROOM AFTER:

Cici had also FaceTime'd from the store when she was picking out sofas.  She loved this set and I completely agreed.

LIVING ROOM AFTER: This make-over really was a re-design.  Most of the accessories I had helped her pick 2 years ago when we re-did her basement.  We decided to use all those pieces this time.  These lamps had already been updated 2 years ago when I painted them and found new shades.

LIVING ROOM AFTER: 2 years ago I had painted, aged and glazed this round table that was a family heirloom.

LIVING ROOM AFTER:  2 years ago I had also had Drew build Cici multiple pieces including the orchard ladder and TV table.  We also re-used the home-made wreaths I had made her.

LIVING ROOM AFTER:

Drew's tv table is also filled with Cici's dad's books.

LIVING ROOM AFTER:

KEEPING ROOM AFTER:  

Drew had made Cici this table 3-4 years ago.  We also decided to paint the mantle.  Drew had also made Cici this chalk board.  The bookcase was hiding in the basement but we brought it up right away.  I used Cici's family crocks to make centerpieces and we used simple architectural pieces to simplify the fireplace.

KEEPING ROOM AFTER:

KEEPING ROOM AFTER:

Cici found these copper bottles at an antique store.  I love them!  She has such a good eye!

KEEPING ROOM AFTER:

KEEPING ROOM AFTER:

KEEPING ROOM AFTER:

An eclectic mix of family heirloom chairs sit comfortably on a highly-durable grass rug.  Cici and RB do have a grandbaby (and a bonus grand daughter).  Durability and easy functionality is still the most important.

Love you two!  

See y'all next time!  We'll dream up something else to decorate during our next Atlanta visit (wink wink!)

XOXO Ashley

J's Far-Away Make-Over

Moving to New York hasn't seemed to put much of a damper on all my relationships back in Georgia.  What's the old proverb?  "Absence makes the heart grow fonder."  Well thank you Jesus, It has quite literally rang true.  Especially since I really don't like to say "goodbye" to anyone.

So when a dear friend from Georgia called with a design request, I couldn't possibly turn her down.  It would just have to be quite a few Skype dates and lots of phone calls and texts.

We finalized the whole job with a fun trip to Georgia that involved two days over at J's place.  And some R&R for me and my brood too.  Prior to the trip southbound, we ordered furniture, had the entire first floor painted a pretty color, and talked a lot about stylistic details.

So without any further ado, please enjoy J's before and after tour!

Here are the BEFORE PHOTOS...

BEFORE: Keeping Room 

BEFORE: Keeping Room

BEFORE: Breakfast Nook

BEFORE: Kitchen

BEFORE: Kitchen

BEFORE: Formal Living


And now...

the...

AFTER TOUR!!!!!!!!!!!!!!!!!!!!!!!


AFTER: The Keeping Room

What is a Keeping Room you ask?  A keeping room is an area adjacent to the kitchen. Keeping rooms date back to Colonial times when families would sleep in that area when the rest of the house was cold.  (Definition of Architectural Design Terms - Glossary of Real Estate Terms)

This perfectly describes what J wanted for their Keeping Room.  A very relaxing place to sit in front of the massive windows, yet completely privy to whatever hustle and bustle goes on in the kitchen.  As a family of five, the kitchen is obviously everyone's favorite room!

We picked a gorgeous neutral color for the walls.  We found a fabulous sectional where the whole family could sit and relax together.  We swapped out the coffee table for a cozy foot-friendly ottoman.  We also did an indestructible rug (dogs and kids approved).  

fullsizeoutput_4db.jpeg

AFTER: The Keeping Room

We used old touches to really give J the look she was wanting.  Her favorite designer is James Farmer III.  A southern gentleman, Farmer classically combines elegant English countryside with a twist.  Think magnolias, plaid fabrics, gold-leafing, fox-hunts, and hydrangeas.  

AFTER: The Keeping Room

AFTER: The Keeping Room

AFTER: The Breakfast Nook

J had this gorgeous french country yellow hutch that she very-much loved.   I filled it with silver platters and vintage serve ware.  The fresh still-life art repeats the yellow color.  This gorgeous farmhouse table was a gift to the family.  We swiftly brought it into the breakfast room.  The wood tone is very rustic and the thinner longer table seemed more suitable for the space.

AFTER: The Breakfast Nook

AFTER: The Breakfast Nook

A new centerpiece!  J requested a single statement piece that could quickly be moved out of the way.

AFTER: The Breakfast Nook

AFTER: The Keeping Room

English transferware, and other blue and white "Staffordshire Blue-type" pieces recieved front row seats in the new design.  How southern?!

AFTER: The Kitchen

Fresh paint and new accessories make the kitchen feel spacious and clean.

AFTER: The Kitchen

AFTER: The Kitchen

AFTER: The Kitchen

J really wanted some of her glass-front cabinets to have a more relaxed french country feel.  We replaced glass with fabric on this set of cabinetry for a truly custom English countryside look.

AFTER: The Kitchen

AFTER: The Kitchen

AFTER: The Kitchen

AFTER: The Kitchen

AFTER The Formal Living Room.

AFTER: The Formal Living Room

The stately living room also got fresh paint.  J's husband, a West Point graduate, had many special pieces we used in the space.  The mantle now hosts a mirror as well as a West Point print.  

AFTER: The Formal Living Room

By moving the sofa, the space feels so much more open.  We also replaced the coffee table in this room.  A leather bench was brought from the bedroom for a new textural element, it serves as an ottoman.  J wanted to keep her current sofa and chairs.  We replaced the rug and purchased all new throws and pillows for the sofa and tufted red chairs to give them an up-to-date wardrobe.

AFTER: The Living Room

In true English southern style, we flanked the fireplace with new floral arrangements.  I composed them using mostly moss and magnolias.

AFTER: The Formal Living Room

I found a beautiful vintage typewriter in J's bedroom that we immediately brought out for the sofa table.  It also received a little floral arrangement of it's own.  Who says typewriters can't have flower crowns?

AFTER: The Formal Living Room

J's favorite things include these two poppy prints.  I decided to showcase them in the bookcases.  They were followed by vintage books, and other family heirlooms.

AFTER: The Formal Living Room

AFTER: The Formal Living Room

AFTER: The Formal Living Room

AFTER: The Formal Living Room

AFTER: The Formal Living Room

J's home is truly gorgeous.  I feel that we really were able to pull off the southern English style, mostly with the help of re-vitalized and re-introduced antiques and elegant pieces that J already owned!  Never doubt the forgotten pieces of furniture or accessories lurking around your basement or un-used spaces; I may be able to help them find their new purpose!

Love you J!  Thank you for the beautiful opportunity to decorate and perform design in your home!  I so enjoyed it!


Backsplash DIY for under $30

So we have been in the house a few weeks now.  And we are moving right ahead with some inside projects.  This is because it is still quite the winter here in Rochester, New York.  And the second it feels like spring, we want to be outside exploring our new city!  In addition to this, I have some exciting upcoming clients!  Yes, hopefully some fun BEFORE AND AFTERS for y'all soon on the blog!

This project can be classified as a $50 Friday!  Yay!  And a DIY.  

Below is our kitchen prior to moving in.  

BEFORE:

BEFORE:

Again, what is wrong with us?  Perfectly good "Before" photos right?

Well here is the deal.  I felt that the kitchen was a bit too masculine.  We are pregnant with girl #2 and my darling husband doesn't even mind soft colors and neutral touches.  The BACKSPLASH MY LOVES THE BACKSPLASH.  Yes.  All this is over a backsplash.  

Y'ALL!  A backsplash determines the ENTIRE feel of your kitchen.  I feel like backsplashes really determine your style.  Perfectly gorgeous granite can be out-played by some outdated backsplash tile.  The market has some fairly gorgeous upscale-looking laminate these days.  You can even take it to the next level with your backsplash!  I'm loving all these basket weaves and penny tiles.  They're gorgeous.  But we can't rip-out tile right now.  And it's not on the agenda or in the budget.

Well all that to be said, our backsplash was already installed when we moved in.  And it is black and grey.  And we have dark brown-grey cabinets.  It is too masculine for me.  I wanted something that felt fresh and "coffee shop".  Side note, all cute cuddly snuggly coffee shops have white tile.  And it feels so cozy and makes you want to drink lattes and wear sweaters and maybe even buy herbs.  My sisters and I would just say: "That is Esque".

Enter in this amazing little product.  Can we just take a moment to honor whoever Mr. or Mrs. Rustoleum is?    I mean this inventor has some GENIUS products for the savvy homeowner.  I mean genius.

BEFORE:

The product was pretty self-explanatory.  It's a two-part process where you mix the two canisters of product to activate the tile-adhesive paint.   Prep is fairly important.  I scrubbed my backsplash with a fairly abrasive cleaner.  Really scrubbing hard.  I then taped off my countertop, cabinetry and walls.  

Well.  As soon as I mixed and activated these products I realized that they smelled like Hades.  I mean if there was a toxic smell on this planet, this was it.  Strait toxic.  And I'm almost 7 months pregnant.  Oops.  I guess hubby has to do this DIY too.  No big loss for me.  I made sure the area was highly ventilated (because I really want to keep him around for a long time).  I also used essential oil diffusers and fans to cut down on the horrendous smell.  He used a regular paint brush.  It's sorta runny.  But it wipes up immediately and goes on fairly easily.

Our backsplash had black and grey tile, as well as dark grey grout, so it took 3 good coats for our kitchen.   

P.S. This product is cheaper on Amazon then at Home Depot.  Win!  Win!!

Once painting the tile, we realized we will be re-caulking the line between the backsplash and the quartz countertop.  

Otherwise I'm feeling very tickled with the turn-out!  Pretty "coffee-shop", don't you think??

AFTER:

AFTER:

AFTER:

AFTER:

AFTER:

Please share your stories or experiences in the comment section!  Happy Painting!!!!!

XOXO 

Love Y'all

Ashley

Fireplace BEFORE and AFTER

We bought our first house north of the Mason Dixon a week and a half ago and let me tell ya, it felt good.  We just love being homeowners.  Can I get an Amen?!  Paint what you want, smash what you want, redo what you want.  It's all yours.  It's like getting your own apartment, or first 'own' bedroom.  You're just really really excited.

We sold Taylor's Wood in March of last year.  It has almost been a year since we got to dig into some of our own projects.  The Lord has been good though.  I've had so many design jobs this past year.  It has completely filled my creative hole.  And doing y'alls projects is SOOOO much fun!!!!

However, call us crazy, but 2 hours after closing, Darling Husband had found a crowbar and we had BIG plans.

Here is our living room/fireplace BEFORE photo.

IMG_0006.jpg

What a blessing of a 'Before' picture.  Natural light, gorgeous floors.  What is WRONG with us?  Well.  I think we have an illness.  Mostly me.  I'll take the blame.  And it's this: I love to take perfectly good spaces and redo them.  To maybe make them a teensy tiny bit better.  Take something that is already 'wow' and go to 'woah'.  That is the fun.  So stinkin' fun.

In other news, the fireplace re-do was going to be a tiny bit functional too.  Y'all.  We are about to be a family of FOUR... and I prefer TVs, electronics, and wires 'out-of-reach'.  Two-year-olds know how to climb on entertainment centers.  So to make life easier, we started our fireplace reno project ASAP.

I envisioned a wood paneled fireplace that extended to the wall (the fireplace stopped short of the wall with the brick, about a foot).  I wanted a rustic barn wood mantle (the existing fireplace had no mantle).  And I wanted all cords and wires concealed (the nearest electrical outlet is on the adjacent wall).

We started by doing some highly "not to code" electrical work.  We used concrete screws to attach 2x2s to the brick, making sure to leave tiny spaces for our highly official surge protector to run behind, what would eventually, be pine wood paneling.  

I know.  We are so legit.  Y'all... don't judge.  Just either steal our brilliant idea, or mentally make a note to NEVER accept electrical advice from us.  I never claimed to be smart.  Just savvy.  And I like pretty decorating.  And I like being a visionary, even when its dangerous.  I live on the edge.  What can I say?

Below is our gorgeous puzzle of electrical wires and 2x2:


The 2x2s, when thoroughly attached with cement screws to your existing brick, lay a perfect grid for safely screwing in the wood paneling 

As you can see, we then started attaching the pine paneling.  We began at the ceiling and worked our way down.  We needed eight 1x12s for our fireplace front.  We have a 3 sided fireplace and we paneled 2 sides.  As you can see, we carefully matched the paneling on both sides.

Code requires the wood paneling to stop short 6 inches on all sides of the opening of your fireplace.   We left a gap where our beautiful surge protector faced out.  We needed to access all those outlets with our mess of electronic crap (sorry male folk, that is what it is to me.  If it were up to me, this mantle would be covered in decorative knick knacks).  Insert marriage and compromise.  My darling spouse will be all the brawn behind my fabulous fireplace facelift, presuming he gets a 50 inch black box and sound system contraption placed atop my gorgeous new mantle.  Life is full of compromise.  I still think I get the better end of the deal anyway.  And he's pretty cute.  So we made the deal.

To finally act like safe adults, we placed 4-6 'easy to access' screws in each pine board so as to access our electrical 'guts' of the operation.  See, I told you we were cautious and unenterprising.  And you were worried about that blasted surge protector.  Pish Posh.    

Next we prepped for the mantle.  We didn't have any ACTUAL barn beams.  We had barn boards.  Easy, we would make a wood frame to cover, on all sides, with our barn boards.  Basically, you fake it to make it.  It actually worked out because the hollow mantle could house extra cords.  Below you can see the 1x1 we used to create our little frame.

First coat of paint.  My all time favorite, Benjamin Moore 'White Dove' in satin finish.  Bless my soul.  This color could have also been named 'Perfection White that Isn't Cream or Yellow'.  Or they could have named it 'The Color of Warm Steamed Milk in my Toasty Coffee'.  It's just brilliant, okay?

Here you can see my darling husband master-minding the cords.  A brilliant little knot-hole in the piece of barn board affixed to the top of our mantle frame, helped run HDMIs and Optic cords perfectly!  

Next we attached the TV wall bracket.  Finally, an easy step.

A second coat of paint, and hanging the TV, along with screwing on the front board of the mantle frame box, finished the project.  We are pretty pumped with the results.

This project took about 8 hours.  It cost $300, much cheaper then a furniture store TV entertainment center.  We bought the lumber at Home Depot and already owned the can of paint, the barn wood, as well as the TV bracket and surge protector.

The results are pretty cozy!   

Apple picking and grape eating in NY wine country

So I thought I'd share some inspiration.  Yes, not all of my inspiration, creatively, comes from inside the cozy place we all call 'home'.   Though I do feel guilty not giving y'all any design ideas today.

We are getting adjusted rather well to this new land of 'milk and honey', called New York.  Though I've eaten quite a bit of local honey already, it should be called the land of concord grapes and crisp apples.  And a side note, the reason I'm referring to this state as such, is because God is quite literally pouring blessings onto us.  I have successfully cooked 3 meals in one month.  And that is because almost all of our other meals have been made for us or brought to us by the wonderful people of Northridge Church, Rochester.  And have I ever eaten this good?  We are talking about absolutely amazing food from God's people.  Mmmmmm Mmmmmm.

But let me tell you about these apples.  Yes, my Georgia loves.  New York apples do hold the trump card every time.  They are so zesty it's not even funny.  The crisp is so crazy that juice flies everywhere.  And on this particular day in the orchard, Joelle and I ate about a dozen apples.  Literally.

So we went exploring on the Finger Lakes and ended up at a winery/orchard.  Yes, the pictures of the vineyards does have the massive lake in the backdrop.  It was a complete slice of heaven.  So I wanted to share.

Don't miss my blurb at the bottom of this post.  God certainly showed up in the vineyard yesterday!

The orchards were completely full of apples.

There is the lake!  Most impressive were the vineyards, grape clusters the size of my head hanging low.  Joelle and I then proceeded to eat so many grapes we felt sick.

What a beautiful day!  We enjoyed it so much.  I couldn't help but be reminded of the words in John:

"I am the vine; you are the branches.  If you remain in me and I in you, you will bear much fruit; apart from me you can do nothing..."

"If you remain in me and my words remain in you, ask whatever you wish, and it will be done for you.  This is to my Father's glory, that you bear much fruit." 

John 15: 5-8

As I ducked and dodged in between grape leaves to grasp hold of the massive bunches of grapes, this verse struck me.  

The Vine is referring to Christ.  And I could see that the base of the vine was strong and thick.  Very easy to understand why Christ is referring to himself as the anchor and foundation and source of life.  

The branches are thin and wispy, and the winemakers are required to hang wire from one end of the vineyard to the other because the branches are so thin and really struggle to hold the massive clusters of fruit.  Let's think about that as a metaphor.

You may consider yourself as someone who is weak.  Or maybe you don't feel you have much strength right now in your season of life.  No worries, my sweet reader.  I want to encourage you, your fruit can be much bigger then you.  The pressure is off.

You see, those grape clusters were massive and beautiful, it's almost comical that they cling to those wispy wimpy branches.  But God is showing you that when he is your source, you can produce things, through him, that are much bigger then yourself.

You can be used by God and have 'fruit' (or proof of your salvation) that is much sweeter and has much more impact then you can even imagine.

Our source, The Vine, is powerful and strong.  Let Him reside in you and help you to produce the fruits of love, joy, peace, patience, kindness, goodness, faithfulness, gentleness, and self control.

 All the things that we as rather wispy, wimpy branches, cannot produce on our own.  I know I cannot produce any of those beautiful fruits on my own.  However with HIS strength, I certainly can strive everyday, to glorify Him with my life.  

XOXO Love Y'all

Ashley


FALL TOUR in our NY rental!

So go ahead and call me crazy.  It's fine.  I've already self-diagnosed myself a long time ago.  I like to be transparent yet accurate in my diagnosis.  And I'm probably strait crazy.

Crazy in that, we moved 1000 miles less then 3 weeks ago.  Crazy in that, while getting my kitchen cabinets stocked, and closets filled with clothing, I have also been hurriedly rushing around attempting to get my readers a cute little home tour together for fall.  Y'all may or may not need some creative ideas.  I can't just leave y'all hanging because I moved from Georgia to New York!

So behold our gorgeous rental.  I'm pretty sure she's like, 70+ years old.  And like all beautiful women, she's got ageless class.  She has hard wood floors on all 3 stories.  She has glass door knobs and curved arching doorways.  She has loads of french doors and crown molding in every room.  She has penny tile and foyer with two front doors.  She's a classic city house and a tall drink of water.  And I'm basically loving blogging her.  She's also like Stairmaster with all the staircases.  Hopefully I'll have epic calf muscles soon.  I've always wanted good legs.  

So don't judge too hard.  I had to whip this home tour into fast shape for y'all.  Hoping our Christmas Home Tour is 10x more dreamy! 

HERE WE GO!


Here is our adorable little parlor.  It's a front door with a penny tile floor, then another door that enters the home?  Quaint right?!  I think all us Southerners don't understand that this second door helps keep cold out, and warmth in.  Makes me nervous just thinking about the upcoming 'tundra'.  That's what Drew and I call the impending first winter.  We are such total wimps.  Anyways.  I totally microblogged this baby.  That shelf with brackets was at a yard sale for $2.  The hook rack is recycled wood.  YES, that is a faux pumpkin.  Because every year I was spending way too much money on pumpkins I had to throw out.  So I do have an assortment of faux gourds to help stop my insanity.  The blanket scarf I fully intend to actually use.  In Georgia I wore it once.  And I was sweating the whole time.  This year, I'm pretty sure that blanket scarf will be wrapped around my face.  Especially if I take a stroll on the beach by Lake Ontario.  

The second area of our home you step into is the staircase and entry.  Drew's mongo desk wouldn't fit up the stairs so this is now the office nook.  Which is totally okay with me.  Please note that this space is highly functional....ahh hem...the printer.

Here is the living room.  It's not nearly complete, but I really am already feeling like it is cozy.  

Courtesy of this little old house, a tiny fireplace niche!  

Architectural salvage from an old barn here in New York!  These cool looking things sit right on top of my grandparents bookcases!

This succulent and the birchwood vase came from a little place in Georgia that Brooky and I always loved to shop!

This grey Pottery Barn sweater blanket was a Christmas gift from my beloved sister!

This 4 foot long solid wood dough trencher was found at an antique store in Georgia  It's almost 4 foot long and came from France.  People frequently made bread in them, but often the farm animals used them as well, specifically goats.

This little room is all windows and I've named in the blog room.  It's cozy as ever and totally gorgeous lighting for all my amateur photography.  It houses my $10 wooden desk, my tufted couch and my funky little chairs that were totally a Craig's List find.

This gorgeous pillow is from a sweet lady at our new church!  We love it Michele!  Thank you for such a sweet present!

These drool-worthy french doors go to our dining room! 

J's vintage high chair came from our southern Mama, Cici.  And her wonderful mama Cozette.  A very very special memory for us.

The fresh hydrangeas and funky bottle came from Becky, the wife and blogger of one of our worship leaders.  I totally love love love hydrangeas.

These cloth napkins from Pottery Barn were a gift from my Mama when J was born.  They're very sentimental to me.  The antique placemats were found at a thrift store.  The vintage silverware is from a garage sale with my old yard saling partner-in-crime, Brooky.  If I could show you a picture of the house I pulled these out of, you would probably instinctively hold your nose and call the cops.  Brooky is fearless.  And if I was risking my life to get out of the car, I might as well buy some really old silverware that needed polished.  "When in Rome..."

These little buck horns are from my daddy.  The florals and mounting plaque were a stolen idea from my baby sister.  She's the better decorator hands down anyway.  The farm painting is from GoodWill.  

These seltzer bottles seem to be getting harder to find.  This green one my mama and I bought at the Country Living Fair in Stone Mountain Georgia last October.  An unforgettable weekend fulfilling one of my mama's bucket list items.

These vintage style glasses are from Kirklands Home Store!  The cutting boards are largely from antique stores, thrift stores, and the largest one is from Pottery Barn.

These adorable mugs are from Melissa at our new church!  Again, we are totally rotten (spoiled) and showered in sweet gifts.  It has definitely been a language of love as we have made this massive transition to New York.

These crocks were gifted to me by my Mother in Law after helping her with some decorating.  

I made these shelves myself using scrap lumber and $1 brackets from Home Depot.

This teensy tiny back stoop was un-usable when we moved in.  But thanks to a few fresh doors being added, I can now leave the kitchen door open to allow the light to come in!  It'll be the perfect spot for snow-covered boots this winter!  For now, my produce and pumpkins are basking in the sunlight!

Thank you for joining me on this years Fall Home Tour!  I'm excited to continue to work on the 2nd and 3rd floor of the home and bring you some creative ideas and fun blog posts!

XOXOX Love Y'all!

Ashley

"1 Year Anniversary" Master Bedroom Masterpiece

M is back at it again!

So my wonderful client M called me back in the serendipitous month of August for her master bedroom re-design!  I say all that because you may remember M.  Her 3 part re-design was my first EVER to go live on the blog!  EEK!  Exactly one year ago, this month, I was at her place having the TIME OF MY LIFE!  And after that, well, y'all know the story.  The Birchwood Blog launched!  See below for M's other room re-designs completed by The Birchwood Blog a year ago!

M also has referred out my name a lot.  She's an avid blog-follower and treats me like a princess.  So...even though we are moving in a few weeks to New York, she talked me into one last 'HURRAH'! 


Below are M's 'Before' photos of this week's design job:

BEFORE:

BEFORE:

BEFORE:


And a few short weeks later, some paint, elbow grease, and healthy decor budget, we finished!  I hope you LOVE her "AFTER tour" as much as we do!


AFTER:  Curtains!  My favorite thing in the world!  

AFTER:  New paint on the walls as well as fresh paint on this mid-century chest of drawers helped brighten things up!

AFTER: I couldn't say 'no' to this architectural-inspired shelf!  It was my favorite part of the new design!

AFTER:  Fresh bedding in a darker tone was perfect for the growing family!  

AFTER:

AFTER:  M wanted cheerful florals.  She already owned these antique lamps.  They had to stay in the room, M and I are both in LOVE with them!

AFTER: We took off M's original mirror that was attached to this dresser.  We purchased 2 framed mirrors instead to add width and light in the room.

AFTER:  We also brought in two additional lamps to increase the light and add elegance to the dresser.  

AFTER:  Faux succulents were an easy option for this busy family.  M wanted details she didn't have to fuss with.  I completely agree.

AFTER:  Most couples enjoy a TV in the bedroom.  It makes marriage-movie-nights extra cozy.  We added a collage wall for visual interest and to minimize the abruptness of the electronic's presence in this romantic rendezvous.  

AFTER:  Some hand-made Birchwood art inspires this corner nook.  A stuffed chair is usually necessary for any master suite.

AFTER:

AFTER: Vintage styled sconces frame the bed, an antique mirror M already owned, functionally is situated on "her" nightstand.

AFTER: Grey neck scarves add whimsy and break up the wood-toned surfaces of the room.

AFTER:

M!  You will always have a special place in my heart when it comes to the subject of design.  You were the first ever client we worked for.  Thank you for putting a lot of trust in me and always being so wonderful!!  I wish you and H all of the best in this romantic room!  Celebrating your marriage brings my heart such joy!

XOXO

Ashley

WELCOME TO NEW YORK (welcome to new york)

So...

Y'all know that ALOT has been happening in the Birchwood Blog household these days.  (See button below to get caught up)

Well, well well.

Oh come on, you remember!?  Remember when I told y'all that we'd sold our Taylor's Wood home and we were in a big transition?  It was kind of a serious post, I must say.  However, I bear good news.  The transition is over.  Did y'all hear that?!?  The TRANSITION IS OVER!  Praise the Lord.  Thank you, Jesus.  

The details are very special to our family.  I write this now, with tears in my eyes.  God has always, always watched over us.  We have been blessed beyond measure.  But when HE goes above and beyond, and takes the tiniest details you barely remember, and ties them together.   Well.  That's when grace gets crazy.  Crazy grace.  Friends this is real.

My loves, you cannot make this stuff up.  I couldn't orchestrate our transition if I had all the resources in the world.  

So we are moving.

YUP.  This Pennsylvania girl, who absolutely loves The South, and has lived in Georgia for all these years, is moving.  

I'm moving back up north.  

TO NEW YORK.  NEW YORK I tell you!

GASPPPPPPPPPP.

You know why, sweet readers?  Well let me tell ya.

Because Jesus means more.  Jesus means more to me then my deep love of the south.  Jesus means more to me then a warm climate.  And magnolia trees.  And 80 degree days in March.  Jesus means more then smocked dresses, and human hospitality.  Jesus means more then flower-filled cities, English architecture, and muscadines.  Jesus means more then friends, and people you love, and neighbors (though I have lots of special prayers asking if I can live near my southern family again in heaven).  Jesus means MORE.

It happened on our first date.  He busted out the P word.  My husband is a Pastor.  And that night, sitting in Macaroni Grill, he told me that he was going to pastor a church that did crazy things for Jesus.  To which I replied: "oh good!"

That was 10 years of ministry ago.

He knew, since he was 16, that God had called him NOT to do what everyone else in his family did (his entire family owns a third generation multi-site successful insurance business).  God had called him to NOT do what he was really good at naturally (he had a division 1 full ride scholarship for basketball).  God had called him to preach the gospel and be a full time pastor.

So about a year ago, the Lord started whispering to us.  It was time for Drew to become a lead pastor and finish his days in all his other ministries.  So we listened.

Well.  God usually calls us to trust him before things make actual sense.  Do you trust your heavenly Father?  That is the scary part.  Trusting when things don't make any sense.  Trusting when there isn't enough money to support your decision.  Trusting when there is no longer a house to live in.  Trusting when there is no longer a husband-paycheck.  Trusting when you move into a tiny cottage you don't own.  Trusting when your husband now stays at home with your baby and you continue to work two jobs.  Trusting, as you journal and pray, that the whispers you heard, actually were The Lord.

But now, we are moving to New York.  And Drew will be the lead pastor at Northridge Church in Rochester.  My loves, I am blown away.  The orchestration of THIS church in THIS city with our God-given gift set, couldn't be more perfect.    It's crazy.  For such a time as this.  That he has picked us.  

Have you ever felt unqualified?  Well guess what.  There is this beautiful worn book that I love to read and it's filled with amazing stories about unqualified people.  Murderers, prostitutes, wicked kings and poor teenagers who were TOTALLY unqualified.  The ones that were overlooked or under-appreciated, seemed to be the people God used to reach many.  

We may be unqualified, but God wants to use us.  I've never felt more humbled in my life.

So you may be asking...

How does THIS effect the blog?  

Well.  For one, I'll probably blog more!  Life will be crazy different.  In lots of good ways.  But one thing is for sure, I'll be inside a bit more when I live in New York!  They get a lot of this crazy white fluffy stuff called SNOW.  So you can be sure, I'll be more committed to bringing all of my readers juicy good posts!

I'll have a new perspective and a new city.  New architecture, new sights.  I'll have new friends to design for.  I'll have a new church to which I plan to use my gift-set at as well.  What's better then decorating God's house?

So please, dear friends.  Don't loose touch.  I have promised our Georgia-family that we will be back every year for hugs and kisses and design and muscadines and Lake Martin weekends.  

I love my Georgia friends and family.  These next few weeks will be, perhaps, one of the hardest things we have ever done.

But please know, that Jesus is worth it all.  And I gave him my heart a long time ago.


XOXOXO

Ashley


Mimi's fresh MASTER

As with many trips to Mimi's house, I was asked to offer my design services on the master bedroom.  Just a quick weekend job.  Nothing too labor intensive or crazy.  Mimi was craving some uplifting style to lighten things up.

I imagine it's the same for all my readers who are really great under the hood.  Every family get-together, you are summoned to check every member's engine, spark plugs, battery, wheel bearings, alternators, rotors, and niners.  Did I just say niner?  By the way, please email me if you are a mechanic and you enjoy my blog.  Cause that's just awesome.  And I may need car help, like, ALL the time.

I guess my point is, God just gives us all different gifts.  And people love those family connections.  My brother-in-law operates his own Chick-fil-a.  Be jealous. 

I have strayed from the topic at hand.  

If you only have a little cash and a weekend's worth of time to re-do a master, let me give you my fast tips to keep things simple and totally cozy.


BEFORE: Mimi and I had hung these window sheers 10 years ago (I used to be old school).  That was before we all knew the sneaky curtain-mounting tricks that helps make standard windows look big and beautiful!  She also wanted an option to change out the comforter.  The lamps were too tiny for the massive bed.  Mimi and Dee are obsessed with antiques.  Like OBSESSED.   Unfortunately, all these pieces don't seem to work together.  

BEFORE

So before I show y'all the AFTER photos, here is my recommend shopping list if you decide to "DIY" your master bedroom this upcoming weekend!

1.  Curtains and Rods.  New curtains always freshen up a space.  Don't go cheap.  Use extra long panels.  Mimi's bedroom ceiling is only 9 foot high but I still purchased 96 inch panels.  Also think extra wide.  These are both standard windows, but I bought double-window rods that expanded over 100 inches.  This allows way more light in the room and makes the ceiling feel higher.

2.  A fresh bedding set.  Again, I don't recommend going too cheap.  Bedding has to endure a lot of wear and tear (imagine if you wore the same outfit every single day).  So keep things durable and soft.  Mimi's room was so so dark.  I opted for all grey, cream, and white.  If you don't want to splurge on the comforter, at least splurge on throw pillows.  It's the master suite, make your marriage more romantic with a delicious-looking pillow pile!  Everyone wants their master to feel like a special hotel.

3.  Lighting.  If you want really big bang for your buck, buy new lamps.  It's never a dull idea to purchase fresh lighting.  Lamps are a big deal and boast serious design influence.  Always, ALWAYS purchase matching lamps for either side of the bed.  In small rooms especially, symmetry is so vital for the eye.

4.  Accessories.  This is last on the list because it's the least necessary.  So many people head to the store and the first thing they do is purchase accessories.  I find that more and more of my clients have loads of accessories and few vital pieces.  Accessories can add up quickly.  Bite the bullet and use your largest hunk of cash on the more needed items above.  If you do decide to drop some dough on accessories, purchase things that mean something to you and are all-season.  Accessories can take you much further if they aren't too season specific.


And now...The AFTER Tour!

AFTER:  Here you can see the fresh new curtain panels and the new rods.  Notice that we carry them to the ceiling and spread them out as far as they can go! 

AFTER: New bedding is bright and cheerful.  There are a million pillows.  How perfect.  I added baskets and a BIRCHWOOD sign to this wall to help the older TV seem less intrusive.  We switched out the existing chair.  

AFTER: New bookshelves were free.  You remember my Christmas blog about Mimi, her basement is like a curiosity shop.  I found the brackets in a dumpster and the wood scraps were from Dee's barn.  She had the antique books and vintage alarm clocks, and everything else in the shelves.  I put together the magnolia sprigs and placed them in antique milk jugs.  We added the bookshelves because Mimi's room is small.  Small rooms should feel cozy and shelves are my newest most favoritist thing on earth.  Period.

AFTER: I told y'all, throw pillows are delicious.

AFTER:

AFTER: I made Mimi this wreath.  Y'all all know how I feel about wreaths too.  And Mimi is a North Carolina girl.  

AFTER: We restructured some of Mimi's grandbaby photos atop the armoire. 

AFTER

AFTER

You know I love you mom.  I'll always re-design your bedroom for you.  Hopefully in 10 years we won't think I was as old-school!


XOXO

Ashley


A Cin(DR)ella story for my new favorite MD

I had the honor of being recommended, by my favorite State Senator's wife, to the very wonderfully adorable, Dr. A.

It's a Cinderella story, really. 

Dr. A just finished the long beautiful journey of medical school, residency, and finally the job search.  Now, she and her precious son and husband, have relocated back towards their roots. They'll be near extended family and she will start her career.  

They bought their dream home and are literally, just moving in.  Below are the before pictures just after home closing.

Dr. A lives with two boys.  She requested that the home decor be beautiful yet comfortable.  She wants easy-to-clean and easy-to-maintain spaces.  She wants things to feel cozy and effortless.  


The BEFORE photos are below:


BEFORE-master bedroom

BEFORE-dining room

BEFORE-living room


So.  After all was said and done, I had a wonderful time preparing this re-design.  Dr. A was amazing to work for.  She was so so open to all of my ideas for indestructible (kid-friendly) decor options.  At the end of the day, everything came together beautifully and I am so excited for this family and their new life!


Now, for the AFTER tour!!!!!!!!!!!!!!!!!!!!! 


The master bedroom feels clean and tidy.  A navy blue tufted headboard hides wear and tear.  Comfortable bedding and multiple quilts add charm and the option of switching out the feel of the room.  A jute rug shows a hint of texture.

A reclaimed dresser adds storage for chunky sweaters and other apparel.  

The living room received an entire new color scheme.  Dr. A loves the color blue.  We didn't disappoint with these pale blue walls, blue pillows, blue accents, and even a recycled blue glass vase.  A custom Birchwood-made TV table houses the components.  A huge rug with blue accents frames the space.  New end tables, a tufted ottoman, soft linen curtains, and tons of special family pieces make this room unique and special.

A long lineage of firefighters, the A family has an original heirloom in this custom copper antique.  

Dr A's grandmother hand-painted all the artwork we displayed in the home.  All pieces were specifically arranged to show-case the amazing craft of this family's beloved grandmother.

Dr A's grandfather was also a physician.  His vintage blood pressure cuff Baumanometer is displayed proudly.

The dining room holds lots of special features.  We replaced the chandelier.  It's much brighter then a ceiling fan.  We brought in a reclaimed wood painted buffet, new chairs, and a new table.  The metal farmhouse chairs are perfectly indestructible for kids and don't have any fabric to keep spotless clean.  The Pottery Barn table is expandable so 10 plus guests can enjoy a fabulous dinner party. We gave Dr. A a custom Birchwood 8 foot chalkboard with one of her favorite Bible verses in white typography.  The linen curtains continue into the dining room seamlessly.  

Vibrant hand-made centerpieces brighten the table.  

The buffet is a tall piece of furniture, allowing pretty, decorative items to be safely tucked out of a small child's reach.  Anyone craving adult decor in a bustling full-quivered home should consider a buffet.   Another one of grandmother's art pieces is displayed, along with teacups and florals.

Thank you for stopping in to visit today!  I hope you loved Dr A's BEFORE and AFTER as much as I did while crafting it for her! 

I pray many years of happiness and joy to Dr. A and her family.  Y'alls home is beautiful and oh so lovely!  Make precious memories and cherish one another.  Continue to honor the Lord in all you do!

Love Y'all!

Ashley

A loft-y SURPRISE!

Long ago we made some EPIC friends.  Those friends that feel like they're from a movie you once saw.  They love fiercely, they do community, they make the best, most exotic grilled-cheese sandwiches you've ever tasted.  They're competitive and feisty and you drink coffee and play board games til 4am.  They're adventurous and wild, so they tell you stories of far off places and people groups.  They stop at nothing, to love God and love people.  They're both beautiful, inside and out.  She's gorgeous and can rock an early native american head-dress.  He can rock a man-bun.  Only gorgeous people do these things.

Yes.  

My loves.  We have these epic friends.  And yes, they're not just in the movies (though I'm pretty sure he starred in a film once).  They're real life and they do real life.  They're actually both really good at doing life, and doing life together for the kingdom.

So when HE called me to schedule a surprise re-design for SHE, I was thrilled.  A sneaky birthday present, how perfect!!

You see, they're both artists.  They both share a love of playing and writing and singing music.  They also both dabble in other forms of artistry.  They're both severely creative.  So to design this space, I needed to get inside their heads.  

They have lots of artifacts from their travels.  They both love history.  SHE had many unique pieces from her Dad and Grandpa.  HE had furniture he had made himself.

So after some careful note-taking, and a few Pinterest board studies, I felt we pulled off an Old-World California Modernist Loft.


Take a look!!!


BEFORE: This was, like, the day after they moved in.  I'd like to see your house the day after you moved in.  My first words to HIM upon entering the loft : "THANK YOU".  Who WOULDN'T want to decorate this AHHHHHMAZING space?????

BEFORE

BEFORE

BEFORE

AND ....

....

...

AFTER

AFTER: HE said that SHE dreamed of white floor-to-ceiling curtains.  16 eleven foot curtain panels later....But aren't they gorgeous?

AFTER: SHE dreamed of a massive vase on the island to fill with flowers year-round.

AFTER:  I used the tiny kitchen nook as a perfect place for HER to sit while he cooks her dinner.  Or whoever wants to claim the spot for an early morning cup of coffee and quiet time.

AFTER: The massive loft allows a corner that faces the busy main street.  A perfect spot to journal or paint.

AFTER: HE hand-made this table.  Antique chairs and vintage dishes invite any dinner party guest.  

AFTER: HE requested that SHE receive some beautiful shelves with antique brackets.  The main street antique store scored us the brackets.  I filled the shelves with many of the couples' treasures, along with plenty of succulents from HER collection.

AFTER: this old metal cabinet was also found in the HIS work shop.  It belonged to HER grandpa.  Sentimental and lofty? Inside it goes!

AFTER: HE mentioned that she may like a coffee bar one day.  Well, today was the day. We also needed an entry table that could do double duty during dinner parties.  I insisted we use things the couple already owned.  We found these vintage metal cupboards and an antique barn board in HIS workshop.  We created this beauty on design day.  This fun world map will be sure to be covered in thumb tacks, highlighting the couples many missions trips and travels.

AFTER: We simplified the kitchen with soft touches and attractive items that are highly functional.

AFTER: HE Scored the coffee table at an estate sale earlier this year.  It was perfect for the old-world feel.  I found this epic glass bottle and HAD to put it in the room.  SHE had mentioned over and over how she loved the look of overlapping rugs.  I have to agree.  It's cozy beyond compare.

AFTER: Nothing makes a designer's job easier then exposed brick walls.

AFTER

AFTER: A table behind the couch was obviously necessary for lighting.  And a place to set coffee cups during a highly competitive round of charades.   SHE already had the lamps.  I just spray painted them gold and added new grey-linen shades.

AFTER: HE said over and over that this couldn't be a 'bachelor' loft.  Well.  Every Old-World California Modernist Loft STILL needs a deer skull.  I decided to get in touch with my "feminine-even-on-a-dead-animal-side", by giving this gorgeous buck a flower crown made of peacock feathers.  

AFTER

AFTER: I found this old industrial cart in HIS workshop.  It was rapidly moved into the loft.  SHE now has room to use it as a serving piece or buffet while hosting family dinners or Thanksgiving turkey.  Vintage crates on the bottom seem perfect for additional storage.

AFTER

AFTER

AFTER

Well.  I quickly vanished after the design so that HE could show his bride HER birthday present in privacy.  But I received a precious phone call, not even an hour later.  Her voice filled with tears as she whispered: "It's perfect, I can't even breathe!"

Let's just say, they lived...

HAPPILY

EVER

AFTER.


Love you J and A.  My prayer for you both, is that God continues to use all of your amazing gifts and talents to grow the kingdom and share HIS name.  A cord of THREE strands is not quickly broken.

You both are precious to Drew and I.

XOXO

Ashley

My girl gets a LOFT!

My longtime friend (We'll call her P) decided to take the big leap.  Yep.  This was serious.  Anddddddd, she moved into an EPIC loft.  

A LOFT!!!!!!!!!  How exciting?  

Oh loft life.   We all can dream, right?  She asked me to put together a design for her to live happily ever after amongst vintage brick walls and industrial style beams.  Why of course!  I'm only a teensy bit jealous.

Now.  We all dream of loft life.  It's for those beautiful people on HGTV who have lives that are super cool.  Well.  P sorta fits the bill.  She's beautiful.  She leads a busy life as a loving mom.  She's a prayer warrior, an awesome Realtor, a steady friend, an active athlete... did I say she's beautiful?!

So naturally, I'll just have to show you how her Birchwood-styled Loft turned out!

BEFORE

BEFORE

BEFORE

BEFORE


AND THE AFTER TOUR!!!

IMG_3748.jpg
IMG_3736.jpg

AFTER

AFTER

AFTER

AFTER

AFTER

AFTER

AFTER

AFTER

AFTER

AFTER

AFTER

AFTER

AFTER

AFTER

AFTER

AFTER

AFTER

AFTER

AFTER 

AFTER

AFTER

AFTER

Thats a wrap!  We love you P!  ENJOY loft living and invite me over for coffee soon!

XOXO

Ashley

BEFORE AND AFTER Staging at L's!

My newest lovely client (we'll call her L) contacted me a few short weeks ago about staging her luxurious home for a quick sale!  I was very excited, as staging can be some of the most rewarding work, like, ever!  L has a fabulous home on the north side of Atlanta.  If you're in the market for a new home with room to spare, you should take a look!

Below are her BEFORE photos.  

BEFORE

BEFORE

BEFORE

BEFORE

BEFORE

BEFORE

Small budgets are no biggie when it comes to staging.  Some fresh paint and accessories and a little "Birchwood elbow grease" can be the ticket to a quick sale!  


Check out our small changes that made a BIG impact!


AFTER -- Make formal rooms feel less formal!  We switched out the formal coffee table for this big cushy ottoman.  Fresh paint too.  We added fun accessories, and new big squishy pillows.  L's collection of vintage prints were so cute, we had to display them!

IMG_3521.JPG

AFTER

AFTER

AFTER--- Again, de-formalize.  Our 6 foot custom chalk board seems to be a fav with buyers.  We set the table for a fun dinner party, and added some color and texture.

AFTER

AFTER

AFTER---- We neutralized the book cases with paint and less-personal accessories.  We opted for a more neutral rug that L already owned.  We added a sofa table with additional lighting and added in fun accessories.  We pushed the furniture closer together to encourage conversation, and highlight the massive size of this true family room.  Ummm, look at those windows!!!  I'm ready to make an offer!

AFTER

AFTER

AFTER--- The kitchen.  We de-cluttered and added-in soft touches.  We removed curtains and added Birchwood Magnolia wreaths instead.  We about died over L's vintage scale (y'all know my obsession), which of course, went right in the middle of the island.

AFTER

AFTER

AFTER--- the breakfast nook got a coffee bar.  L's high-end espresso machine screamed fancy schmancy.  Buyers like fancy ideas and possibilities.  Don't mind the subliminal messaging with the butcher paper Birchwood sign (It's all for the cause L)!

AFTER--- We reduced the size of the table and did a cute little centerpiece.  Eucalyptus, cause I'm just so obsessed.

AFTER

AFTER... Who doesn't want hot espresso in this fabulous kitchen?

AFTER--- The bed got some new pillows.  We switched out some lighting and add accessories.

AFTER--- We used lots of fresh white towels and some new greenery in the bathroom.  

Happy selling L!  I can't wait to see all your offers!


XOXOXO

Ashley

Dear Readers

Good Afternoon my loves!  I am ashamed to say hello after a quite a few months of NO BLOGGING.  Please please forgive.  And let me explain...

Life has become crazy and I wish I could unravel all of the amazing things that have happened to our family over the past 14 weeks.  God is truly amazing.  We have so much to be thankful for!  But it would take up entirely too much space and time to tell y'all all the beautiful details!  So, I give you, the quick-version.  


We moved out of our dream home after some successful staging and a wonderful sale!  Goodbye Taylor's Wood, you were good to us!

We now rent a tiny cottage as we endure a rather large 'life-transition' (more to come).

Decreased internet access at the cottage has made blogging almost impossible.  

I have been working many-a tender hour at the hospital taking care of my wonderful precious patients.  

My daughter is basically in college (not really, she's 20 months old) and talks non-stop in complete sentences. 

We are heading to Africa in July for some exciting missions and a pastor's conference!

I have NOT stopped design-work and have many exciting things to show you!


So please, my loves.  Keep us in your thoughts!  And keep an eye out for some of our stunning posts this month!


Still XOXOX!

Ashley


DIY vintage toy kitchen

HAPPY $50 FRIDAY MY LOVES!!!!!!!!!!!!!!!!!!!!!!!!!!!

So my baby girl turned one in September.  Oh it was horrible.  I am like any typical mama.  I am completely in depression that she is growing up sooooo fast.  Why does God make that first year go so so quickly?  It's absolutely heart wrenching to watch them get so grown.

First, there is that perfect newborn stage where they just sleep on your chest and grunt and act squishy.  Then that amazing three-six month stage when they learn to smile and coo.  The stage where they crawl around and laugh and say mama and dada.  And then they're one.  My daughter is now 18 months going on 18 years old.  It's awful.  She runs everywhere and talks non-stop.  I'm a mess.  Why does she have to grow up?  I've decided I fancy arranged marriages now.  It's perfectly logical that I elect her future husband.  Oh I've never prayed for anyone like I pray for that sweet baby girl.

Back to the DIY story.  She is growing up.  And I need to grow up too. 

And what do grown-up baby girls receive for their first birthday?  A play kitchen, of course.

Well I wanted something that wasn't expensive.  And I had a small desire for something that was cute.  My friend Kayla says all my baby's toys are so "aesthetically appealing".  Oh, hashtag blogger probs.  Ugly toys really do mess up my photo shoots for y'all.  What does one do with ugly toys in the background of pictures?  

Well we can just come up with our own version of a kitchen.  How about that?!  Hashtag I'm not a control freak at all, am I? 

Before I knew it, MiMi was offering to buy the grand-baby toy kitchen.  So I told her to hold off until I found us a good project.  MiMi knows a good fixer-upper and it would be a fun project to do together.

I finally found the one.  My beloved girlfriend was having a yard sale to raise funds for her international adoption.  And what was donated?  A shabby toy play kitchen!  I didn't snap this 'before' picture until after I had scrubbed the kitchen down with a good cleaning rag.  So it actually looked worse then this.

It clearly has adorable bones.  But could it be MORE adorable?  Of course!  

So this little DIY is how to doll-up a little garage sale toy kitchen.


This particular kitchen had some obvious flaws.  Maybe you are in the market for a toy kitchen for your toddler.  And the yard sale variety isn't cutting it.  Think again!  With a little help, any garage sale kitchen can be a vintage-glam kitchen!

Our kitchen had some minor flaws.  It had no sink basin.  All the shelves were missing from within the toy-oven and under the sink.  The handles on the fridge were too small and some were missing.   Other various handles and knobs were also missing.

We decided it needed:

A fresh coat of paint

A fun little sink skirt, which we would sew

New stove knobs

New handles on the fridge

A fresh coat of paint on the faucet

New hot/cold knobs

Wrought Iron hooks for little vintage enamelware pots and pans

A wooden crate to replace the missing basin

Accessories


So where did we go?  Our neighborhood Hobby Lobby of course! 

First we decided to finish removing the 'mostly-missing' oven and under-sink cabinet.  We removed all hardware and my darling hubby cut a fresh board for the bottom of the cabinet.  We then sewed a little gingham sink skirt out of 1/2 yard of fabric.  I just hemmed all the ends.   I then bunched the top of the skirt and used a utility staple gun to attach the skirt up under the wooden sink.

Next, we gave the entire piece a coat of white paint to freshen it up.  I just used semi-gloss white Behr paint from Home Depot. 

I also spray painted the old grey faucet an antique-red color to match the gingham sink-skirt.  Valspar $3 spray paint did the trick.  I threw away the old knobs and the old wooden hot/cold knobs. 

We found some cute little drawer pulls in ceramic-red at Hobby Lobby and used those as the new stove knobs.  Gosh, did they turn out cute!  We also found hot/cold vintage ceramic knobs for either side of the red faucet.  Drew screwed the new wooden crate into the bottom of the counter top as the new sink basin.

We decided upon cute glass handles to make the new fridge pulls.  They were larger and easier for babygirl to use when she opened her fridge.

We then discovered a few rusty Hobby Lobby wrought-iron red hooks to attach to the side of the kitchen for utensils and pots.  I had found some vintage red and white enamelware pots and pans at an antique store that just had to hang on those cute little red hooks.

It was sort of like the book "If You Give a Mouse a Cookie".   We just kept going with all the cuteness.

I'm pretty sure the kitchen turned out perfect.  MiMi accessorized with wooden toy food and a baby-kitchen-aid from Pottery Barn Kids as part of the Birthday gift.

I think the after photos don't even do her justice!

AFTER

AFTER

Love Y'all!

Ashley

Pretending to Chalk Paint a Chandelier

So I had bought this chandelier a lifetime ago at a church flea market.  Actually, my darling husband bought the chandelier.  It was a day when I was scheduled to work at the hospital.  On such a lovely day, there was a massive community flea market up the road that I knew would be good and juicy.  I had a feeling in my gizzard it would be stocked with the good stuff.  So I had sent Darling up the road to the sale at 7am with $50 cash and told him to bring me back the first chandelier he found.

Well my gizzard is quite trusty, and so is my man.  He came home with a massive gold chandelier.


Well.  It was pretty gold and has a lot of lovely little crackle techniques all over it. It wasn't quite being very "trusty" on it's own.  I needed it to feel awesome.

I am sorry to say, that my chandelier sat in a corner of my basement for 5 years.  I felt bad for her really.   So when we left The Birchwood, we moved to Taylor's Wood, and along she came. 

Here at Taylor's Wood I decided her crowning glory would be hanging in the breakfast nook.  But she still had crackle technique and too much gold.

Insert pretend-chalk-paint-technique!


You will need:

Light blue paint

Minwax Finishing wax

Rags

White acrylic paint

round shaped light bulbs


All I did was mix 1 cup of minwax finishing wax with 1 tablespoon of blue acrylic paint and a tablespoon of white acrylic paint.  I microwaved the globby mixture for about a minute and stirred it up with a plastic spoon. 

I then allowed the "new wax" mix to harden in the sun.

Then I used my rag to gently smear the new paint/wax mixture onto the chandelier.  Be hap-hazard and I was pretty strategic with smearing the paste on mostly raised areas of the chandelier.  Take heart.  If you hate the overall effect, you can always scrub it down and spray paint it another color.

To finish off my "new look", I replaced chandelier bulbs with round bulbs.  It just kind of made it more conversational.

Whaaa-Laa!  I knew she could be amazing!  Enjoy the new light!


Everyday Design (C's BEFORE & AFTER)

Who doesn't want some exciting everyday design that makes them feel happy every morning?

When you wake up, what do you see?  Maybe you pad to the kitchen and fix your family breakfast.   Heating up the baby's milk, warming your own hands by the stove as you stir the quaker goodness in with the milk.  Or maybe you run to the kitchen and quickly blend a banana and kale shake, before you race to the office. 

You sit on the floor of your living room and read gently worn books to your kids, wrapping yourselves together in textured quilts and placing another log on the fire.  Or maybe you lay on the floor of your living room and perform your daily yoga, the cool crisp mat between you and the hardwoods.  The sunlight streaming through the window on your skin.

You host your girlfriends for a Friday night poker party at the dining room table.  You laugh til you cry and sip coffee and serve tasty appetizers.  Or maybe you just hosted your grandmother for dinner and used the dishes she gave you, just to make her smile.

Whatever your life story, whatever your days become, why not enjoy everyday design?  We all live every day lives in every day rooms.  But they should be memorable.

C and her husband A contacted me to perform some everyday design in their family living room.  So, after a fun-filled weekend of paint and decor, I bring you a HAPPY MONDAY 'before and after' to make you smile!

Thanks C and A for allowing us to showcase your ADORABLE room!

BEFORE

BEFORE

BEFORE


Andddd.....the AFTER tour!


AFTER

AFTER

AFTER

AFTER

AFTER

AFTER

AFTER

AFTER

My favorite element?  Well I'm glad you asked!  The EPIC surprise grey fireplace!  Oh it's to DIE FOR!

Love you C!


Ashley

Vietnamese Noodle Bowl

I intended, last Sunday, to come home and make a heaping hot plate of Thai food.  However when this dish was all said and done, it tasted like my favorite Vietnamese noodle bowl.  Y'all.  Mmmmmm Mmmmmm!

All the freshest crisp ingredients on top, with the hot steamy cooked veggies and soft noodles underneath.  Oh for the love!  It was downright AMAZING.  When my husband told me it was hands down, the best Asian recipe I'd ever attempted, I reached for the camera to snap some pics to share with all of you loves.  

Drew is pretty picky.  He likes fresh, exciting, new, different, healthy, recipes.  Take that.  All y'all at home trying to be good spouse-cooks.  That's his wish list for my dinner selections.  My spouse wants me to incorporate all of those adjectives into meals.  Oh Lawd.  I'm just getting started with this whole 'cooking thing'.  He was our primary family cook for 7 years.  Boy was I bamboozled.  And now I gotta try and do all that. 

Y'all don't understand.  I may type like some epic foodie psycho.  But no.  Just, no.  I'm the chick that has eaten stove-top Oatmeal every morning for 4 years strait.  I pack the same salad for lunch every day.  And I could eat cereal every night for dinner.  Okay okay okay.  So yes.  Yes.  I have an unhealthy love of cheese.  And yes, I enjoy chocolate and some good deep dish macaroni.  I love me some weird sushi.  I can kill some lebanese Baba ghanoush.  My parents taught me to enjoy everything from all cultures and I really can eat just about anything.  On the other side of the spectrum is this random habbit-forming desire to just eat the same stuff day in and day out.  Probably complete laziness.

But let's be honest, you'd want me in your bunker when the zombie apocalypse strikes.  Because I'd be the kid in the back eating the bland stuff.  Drew laughs and tells me my taste buds all died.  I can just eat basically bland rando stuff.

Wow.  Back to the recipe.  This dish is anything but basic.  So grab your prettiest set of soup bowls.  And start cooking this wonderful dish!


Vietnamese Noodle Bowl

Ingredients:

1/2 head finely chopped cabbage

2 cups chopped mushrooms

2-3 large carrots sliced thin

4-5 scallions chopped

1/2 box of angel hair pasta, cooked al dente

1 egg

1 cup fresh cilantro-chopped

1 lime cut into wedges

2 avocados- cut into chunks


Sauce:

3-4 tablespoons grape seed oil

1 cup Bragg's amino acids (or soy sauce)

2 tablespoons brown sugar

1 tablespoon rice wine vinegar

1 tablespoon red curry paste

3 teaspoons minced garlic

2 teaspoons minced ginger

1 teaspoon red pepper flakes


Wisk all sauce ingredients in a small bowl and set aside.

In your WOK or large skillet, cook all veggies on medium-high heat for 3-5 minutes or until lightly tender.  Push veggies to the sides of the Wok and wisk egg in the middle of the hot wok at the same heat.  Once egg appears to be cooked and scrambled, use your wooden spoon to mix the entire contents of the wok.  Turn the heat off after a few stirs and immediately dump in the cooked noodles and all of the sauce from the bowl you set aside.  Stir a few more times until all of the Wok ingredients are incorporated.  Divide out your bowls of noodle mix.  On each person's portion, squeeze a large lime wedge, place a scoop of fresh avocado, and a tablespoon or more of cilantro.  

Eat and enjoy this amazing fresh, yet tasty filling noodle bowl!


Love Y'all!

Ashley


Serves 4